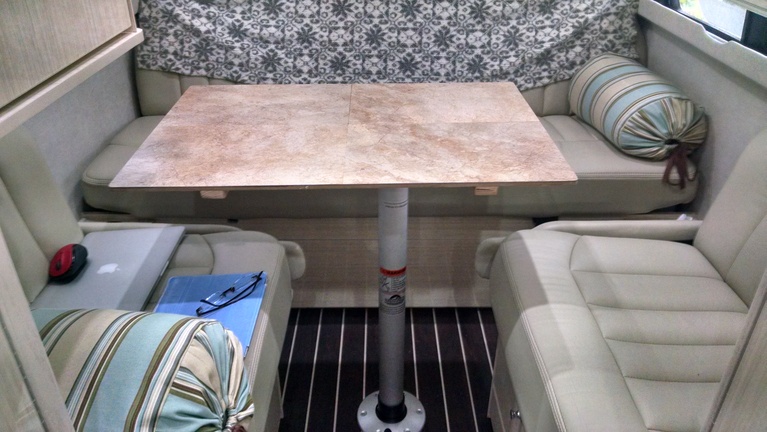
We have hated the stock table that came with our Interstate from the beginning and before we left on this trip I made several patterns and finally a prototype replacement. It required the removal of the original bracket and hardware from both the original table and from the front of the kitchen.
The prototype is made from 1/4″ hardboard and has four floor tiles from the leftover rack at your favorite home center to provide a cleanable surface. As shown above, the receiver was reused on the table so it can use the original post. We wanted the offset so the table could be used in the position above or turned 90 degrees to provide a good position for eating or working. The receiver is mounted on a leftover piece of 3/4″ stock and connected to the table using half laps creating a slide. Again, 3/4″ stock was used for the rails mounted to the table. A very generous coat of wax was applied to all mating surfaces to provide for smooth operation. Things to tend to stick a bit when it gets really cold but for the most part, it works pretty well. Not sure if that will make it into the final product or not. A better solution might be some UHMW tape strips but we’ll have to see how this works. That probably would have been too much for the prototype but in the end the wax isn’t going to be enough to keep things friction-free long term.
We thought about hanging the new table on the door of the tall wardrobe but that was a bit much to expect from the hinges under travel conditions. We opted to mount it in the same place as the original, in front of the kitchen. The corners of the table have a slight radius.

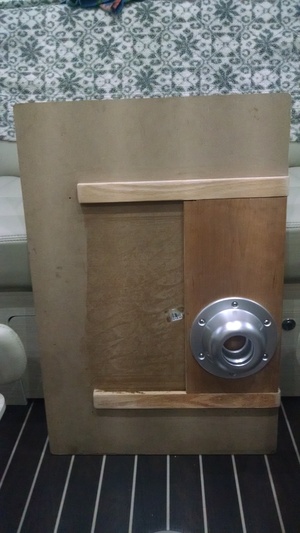
The new mounting bracket has a matching cutout to hold the table like the original table’s beveled corners. The mounting bracket is screwed into the frame beside the fridge so there is a full inch or more of bite. Since the table top is thinner that the original the floor-mounted bumpers had to be replaced with larger ones to hole the table in place.
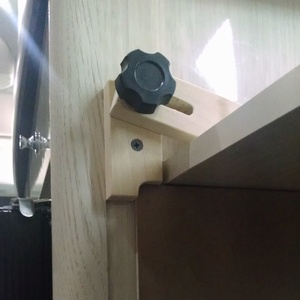
The slot allows the bracket to be locked in the open or closed position. We thought we’d have to take out the fridge to make sure there was no interference with the screws but there’s plenty of material in the frame to avoid that. As shown, the table is about 1/16″ below the pull-out work shelf behind the driver so it is as big in both dimensions as it can be. We are happy so far and looking forward to the final which will be furniture-grade birch plywood with a laminate top. Same mounting system but better friction mitigation.
Gregory Dick
Well, that’s very nice. At first I didn’t catch the “before we left” remark and I was going to inquire about mileage when towing a trailer – full of a wood shop. 🙂